How to make a wood stove fan from scrap
We have already discussed why a wood stove fan is a good idea, as it helps distribute heat from your stove further through your home. Now you can learn how to make a portable, cheap and effective wood stove fan unit to use around the home.
You will need:
- an old mobile phone charger
- the case fan from an old pc
- some small off-cut pieces of wood to mount it all on
- some small self tapping screws
- wire strippers or a sharp knife
- 'chocolate block' junctions for the wire - electrical insulation tape will do but is less robust
Now before we begin there are a few safety considerations - messing around with electricity is potentially hazardous. As with any project on this site you undertake it at your own risk.
This project is safe to do provided you follow the instructions as everything downstream of the power adaptor is low voltage. The adaptor itself is designed so that it limits the current. We never mess with the adaptor itself so this safety remains.
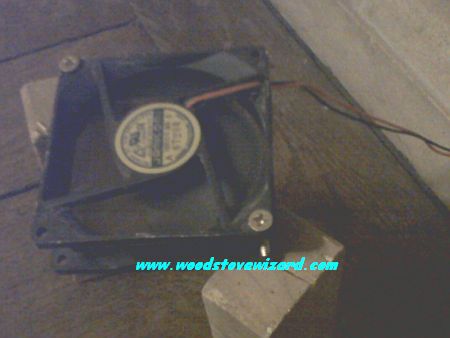
Wood stove fan assembly - step 1
The first part of this job is identifying the power connectors on the fan - pc components run at similar voltages to mobile phones, and can cope with some variation in voltage supply.
Most pc fans have a length of two strand cable coming from them. These are the cables which we will strip and connect to the cables from the mobile phone charger. Your fan may have some other arrangement of cables, if so you may need to adapt the following methods to suit.
You also need to assess the fan and figure out how to attach it to the wooden base - you may be able use existing screw holes, or may need to make some more through the plastic case.
Step 2
Your old mobile phone charger is due for the snip next - simply take sharp knife or pair of scissors and remove the end which connects to the phone, leaving the remaining cable attached to the plug as long as possible. You should now see that the cable is made up of two separately insulated strands. Pull these strands apart so that a few cm of each is now detached.
Now strip off half an inch, around two cm, of the insulation from each strand to leave bare copper.
Do the same with the power cables on the fan itself so that you can connect the two sets of cables together (it doesn't matter which way around so long as they don't short circuit).
Step 3
Now twist corresponding bare cables from charger/pc cable together and wrap each join tightly in electrical tape. (Junction blocks give a more secure connection if you have them)
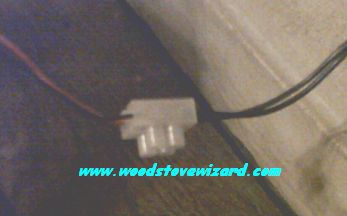
Inspect your wiring to make sure no bare copper is exposed - you may need to adjust your connections and/or use some insulation tape to wrap exposed cables. This is an important safety step to prevent short circuits and possible electric shocks.
You are now ready to test your wood stove fan - plug your hybridized charger into the mains. If everything has worked properly the fan will spin up immediately. If it doesn't then turn everything off and unplug it before checking over the connections.
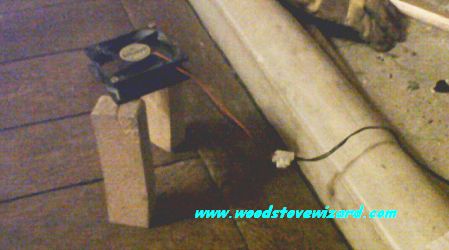
Step 4
Assuming that everything has gone smoothly so far you are ready to install the fan on its stand. This really doesn't need to be anything fancy - just a block of wood so the whole thing doesn't fall over. My father has his raised and tilted at a slight angle, but this is an unnecessary feature.
This one gets used in various places around the house, depending on where we want the heat. The blocks of wood simply stop it toppling over but you could come up with a much 'neater' way of supporting it.
You may like to put a bit of thought into the overall appearance at this stage. The major obstacle to using these around our place is that 'they look messy' although even mum tolerates them in cold weather for the extra warmth they bring to the kitchen and study.
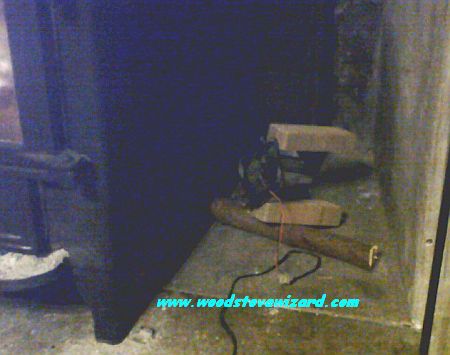
Once you have firmly attached the fan you are all set to use it. Try it in a few different spots around the home and let me know how you get on with it!
Site Navigation
- Home
- Woodstove Blog
- Woodland Diary
- Share Your Tips
- Best Firewood
- Firewood Types
- Kiln Drying Firewood
- Splitting Firewood
- Splitting Kindling
- Stacking Firewood
- Woodshed Plans
- Firewood Racks
- Firewood Storage
- Camp Rocket Stove
- Woodstove Plans
- Barrel Stove Kit
- Thermal Mass Stoves
- Stove Fans
- Draft Guards
- Wood Stove Steamers
- Fisher Wood Stoves
- Biochar
- Pellet Stoves
- Biomass Fuel
- Assorted Articles
