February In The Woods - 2011 - Part 1 - Pitching The Parachute

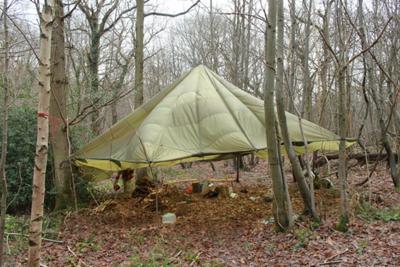
Parachute Shelter - plenty of space to work and even light a fire
Half term came around and we finally got out to the woods for a decent chunk of time. We spent three nights camping, cooking, walking the woods, sitting by fires and generally getting a feel for it. It is a very different and pleasurable experience actually immersing yourself in the outdoor compared to an afternoon visit!
Saturday Afternoon - General Site Prep and Parachute Rigging
We managed to get out for a few hours on Saturday, but with commitments in the evening it was only a short visit. The main objective was to work out exactly where we'd site our camp and to start rigging the parachute shelter.
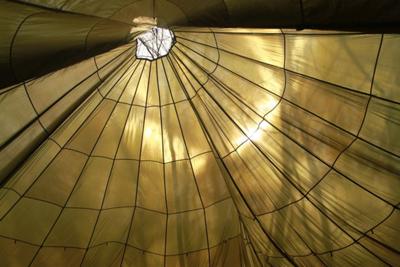
The parachute is army surplus, 30ft in diameter and olive green. The idea is to pull the center up high into the trees and then peg the edges out sideways to hold it open. It makes a great work area and, with the hole at the top, you can even light a fire beneath it. It sheds most of the rain so even in the worst downpour you can carry on working.
We found a likely looking spot, pretty much level and with a reasonable opening. The first job was to cut a selection of pegs and poles to anchor the edges with. There is a decent amount of hazel in the area and with a sharp knife and carving axe the job goes pretty swiftly.
We then threw a lead line over two tree branches at opposite sides of the clearing and used them to haul the main support rope up and over the branches. The two support ropes are tied to the center of the parachute so that when they are pulled up and over the branches they lift the center up. Much easier than finding a spot with the perfect branch in the middle of a clearing!
We had two big problems with the parachute:
1: Brambles!!!
We didn't think to clear the area before we started. Major mistake! Brambles snagged, grabbed and generally hampered moving the parachute around.
2: Getting even tension
Once you start pegging out edges it becomes difficult to tell quite where each peg should go. We started in one spot and worked around in a circle but eventually realised that we had pulled one whole side out too far and hadn't left enough slack to pull teh other side out.
I think next time we'll try to get 4 corners in approximately correctly then fill in the gaps.
Overall the parachute proved a huge success - with the fire going it was substantially warmer than the surrounding air temperature. I've rigged up similar shelters using tarps before and there are always problems with rain collecting and the weight collapsing things. Because the parachute is slightly permeable to water, rain runs down to the edges, pools slightly, and then drips through the fabric - but only right near the edges! No unexpected dunkings when 20 gallons of cold water tips off and pours down your neck.
How To Anchor The Edges
Our parachute came with some short webbing straps every 3ft or so around the outside - not long enough to anchor directly, but useful to fasten guys to them.
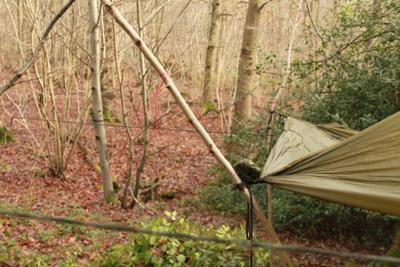
We used some convenient trees to tie to, but in many places used a pole, peg and guy-line combo that works really well. For each point to secure you will need:
- A thin sturdy pole around 7ft long - sharpened to a stake at one end.
- A long wooden peg - a notch cut 1/3rd deep to catch the guy-line and a sharpened point.
- Around 3m of good quality string - we used a combination of polyprop string and paracord (paracord is expensive or we would have used more). It also helps to have a lighter handy to melt the cut ends of the string and prevent fraying.
Pull the parachute out to the position you want it and fix the pole to the parachute using the string. Don't forget to drive the stake into the ground and slant it so the top is away from the centre, base is slightly inwards. Next put your peg in the ground, but angled the opposite way from the pole, and tighten the string between them.
The result should be a stable triangle that both holds the side of the canopy up and out.
You can secure a parachute canopy just using stakes and poles like this, if there are not any well placed trees. Provided your pegs and knots are strong enough it should stay put under normal weathr conditions.


